Sunday, July 31, 2011

Soft Pretzel Bites

Dr. Bob found this recipe on the website "Crepes of Wrath."

Go there.

Make recipe.

Love it.

That is all!

:-)

Thursday, July 28, 2011

Blueberry fun - Part 1

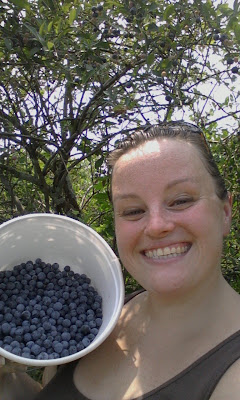
Mmmmm, don't they look delicious?!

A couple of new friends and I decided to go blueberry picking last week. It was a lot of fun...however we seemed to have picked the HOTTEST day ever to pick blueberries! Good grief, the sweat was dripping off us.
Luckily we got a good amount of berries in a short amount of time. I couldn't wait to get home and try some yummy new recipes.

Now, I am not going to lie, I am not a huge fan of blueberries on their own. But I am all about including them with other fruits or baking them into awesome baked goods/desserts.

Hence why we are here today:

I found this recipe for blueberry muffins on Allrecipes.com. It made only 6 muffins so I followed the commenters advice under the recipe and doubled it. I also made a few changes again per the commenters advice. Here they are:

Ingredients

  • 1/2 cup all-purpose flour
  • 1/2 cup whole wheat flour
  • 1/3 cup sugar
  • 1 1/2 teaspoons baking powder
  • 1/4 teaspoon salt
  • 1/4 teaspoon ground nutmeg - I used less nutmeg
  • 1 egg
  • 1/3 cup milk
  • 3 tablespoons vegetable oil - I used 1/4 cup of oil
  • 1/2 teaspoon vanilla extract
  • 1 cup fresh blueberries
  • *I added 1/2 teaspoon of cinnamon
  • *I also added 2 tablespoons of flax seed (always good to get some extra Omega 3's and dietary fiber!)

This ended up making 12 large muffins and 12 mini muffins.

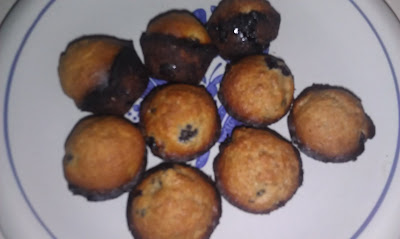
Now I also have to warn you about how long to bake these bad boys! The recipe calls for 25-27 minutes at 375 degrees. I planned to check on the little guys after 20 minutes and this is what they looked like:
YIKES were they crispy! I know we are still getting used to cooking in a new oven and this sucker gets pretty hot, pretty quickly...but make sure to keep an eye on the little guys. I think they would have been fine at 15 minutes.

We can't always perfect the recipe the first time around now can we?? ;-)

The regular size muffins came out really pretty great.
And pretty tasty.

The other blueberry recipe I found was this Blueberry Loaf Cake on Allrecipes.com as well. This one came out phenomenally!
The only change I made was to up the amount of blueberries from 1 cup to 1 and 1/2 cups.
So those were my blueberry concoctions from last week. Dr. Bob had free range over the rest of the blueberries and trust me - he put them to good use.

He is going to be posting a Blueberry fun - Part 2 soon so stay tuned!

Reader Question:
What is your favorite blueberry recipe to make??

Friday, July 22, 2011

Strawberries, strawberries every where....

Well hello again, so nice to see you visiting our page and checking out all of our yummy delicious recipes! I am pretty excited about this one. It is all things strawberries! And strawberries happens to be one of my FAVORITE fruits ever!!

Can you believe that I have never been strawberry picking as an adult?! The unbelievable horror right?! I am about 90% sure we used to go as kids all the time but I just never get around to it during strawberry season! UGH! I definitely thought this year was going to be my year....I had every intention....I planned for it all year...but alas it didn't happy yet again. :-( We had a few things going on this June (when strawberries are in season in New York). I don't know why it would get in the way or anything. What was that little thing that got in the way and kept me from doing what will one day become one of my favorite things to do each spring/summer???

Oh that's right, we decided to move 1100 miles away from home! So we were busy tossing unnecessary items, cleaning, organizing, packing, eating through our fridge so we didn't have to toss out tons of good food! It really put a damper on our time in the kitchen and that made us pretty sad. I think that is why our storage freezer is currently filled to the brim and we haven't even been here a month yet! (Plus it took us almost 2 weeks to find a pan to sit under our freezer to protect the rug in case it decides to suddenly defrost and get water everywhere!)

Okay enough jibber-jabber....let's get to the point of today's post: what to do with yummy, delicious strawberries!

Remember this picture of all our delicious purchases from the huge farmers market?
See all those strawberries?? Well something needed to be done with all of them because I love them and all but I wouldn't be able to sit there and eat all of them one by one. I think I would turn into a strawberry at that point!

So I started off by prepping them. Stems and bad sections were cut off and then they took a bath to get rid of any dirt or other things I don't want to think about.

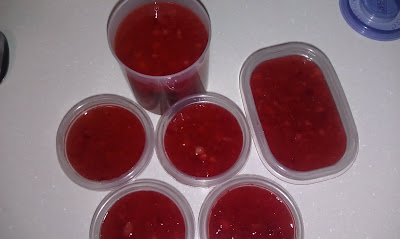
I knew I wanted to try a recipe from The Frugal Girl called freezer jam. She made a bunch at the height of strawberry picking season and it sounded delicious! You can find the recipe here. It is great and she leads you through step by step. Here is the finished product of my freezer jam:
Doesn't it look delicious?? I bought some bagels the other day (rare occurrence in this household) but have been loving the toasted bagels with freezer jam as a topper. Today I took it to a new level and put peanut butter on first and then jam.....YUM!

Next I used a recipe that the Doctor found in our "Better Homes and Gardens - New Cook Book" called "Fresh Strawberry Pie." Luckily I was able to find the recipe online so I don't have to type it all out!

First they have you make a Baked Pastry Shell which you can find the recipe here. It is a basic recipe where you follow the ingredients to make the dough but then make sure to look for the extra instructions for the Baked Pastry Shell. Pretty simple recipe.

Then you get into the heart of the matter and make the strawberry filling which you can find the recipe here. I definitely thought it was going to be a lot harder than it was but it totally wasn't hard at all. The best idea I had was to blend the strawberries for the glaze in my knock off "magic bullet" since I don't have a food processor. Super easy!

When the pie is all put together, you pop it in the fridge to cool for about an hour or two and Tah Dah:

A beautiful strawberry pie! And make sure to serve with some great tasting whipped cream!
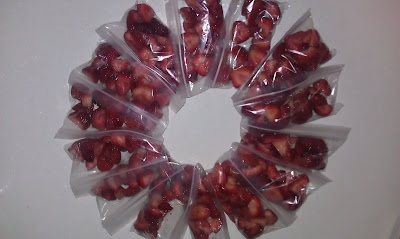
Even after making the freezer jam and the strawberry pie (which, put together, accounted for at least 14 cups of fresh berries) I still had a bunch of strawberries left over!

So I packaged them up in 1/2 cup servings, threw them into snack bags, and tossed them in the freezer for future breakfast shakes!That's right....14 snack bags full of fresh and delicious strawberries!

Have I mentioned that I love strawberries??

Have you also noticed a trend here? Dr. Bob usually posts about the savory while I take care of the sweets?! That's how we roll in this household.

Well thanks for spending some time with me talking all about strawberries. Stay tuned for next time. I went on an adventure on Wednesday which may lead to my next post. Want a hint? Here you go:
Have a great day everyone and try to stay cool in this terribly hot weather!

Reader Questions:
Do you like strawberries?

What kinds of treats do you make with fresh fruit?

Tuesday, July 19, 2011

Simple pot roast

I love my slow-cooker. That's not to say that the biologist in me didn't get freaked out about low temperature cooking of meat for a long time, but a little research put away those fears.

After our trip to the farmers market on Saturday, I decided it was time to make a bulk meal that could last me for a while. So, pot roast it was.

Ingredients:
12-15 new potatoes (the little ones, sometimes called creamers) poked a few times with a knife
1.5 cups carrots (either baby carrots or just chop up some regular ones)
1 can tomato paste
12 oz. Guinness
1 onion, roughly sliced
Worcestershire sauce
Olive oil
Minced garlic
3.5 pound chuck roast
Salt, pepper, oregano, parsley

Heat up some oil in a large pan, and add about a tablespoon of minced garlic. When the pan is nice and hot, add the roast, and brown about 3-5 minutes on each side (depending on how thick it is.


After you take the roast out of the pan and place it in the slow cooker, add some roughly sliced onion to the pan and cook until the onion just starts to soften. Scrape the onion and the rendered fat and olive oil into the slow cooker.


In a separate bowl, whisk together one small can of tomato paste, one 12 oz bottle of Guinness, 2 tablespoons worcestershire sauce, and a nice coating of oregano and parsley. You can also add about 1/4-1/2 cup of red wine at this point. I didn't, and wish that I did, but it's not essential. Add about a teaspoon of pepper and a half teaspoon of salt.


Add the potatoes and carrots to the slow cooker.


Pour the Guinness mixture over the meat and veggies, and add water to cover (probably about 2.5 cups).


Cook on low for about 5 to 6 hours. Check the temperature of the meat (should be about 155).

Enjoy!

Monday, July 18, 2011

Your Dekalb Farmers Market

Hello There!

There is this place that we have been hearing about. We have been told it is amazing. We have been told it is huge. We have been told it is unbelievable. We have been told we must go to this place.

What is this place you may ask? It is called, "Your Dekalb Farmers Market", yes "Your" is actually in the title - here is the website.

It is about 10 maybe 15 minutes from our apartment. We have been wanting to go check it out but we haven't succeeded...until Saturday that is! I was SUPER excited. It was a rainy, dreary day so it was perfect to go check out the Market. We had plenty of reusable bags, I was ready to snap some pics so I could show you the fun, and we had cash in hand to pay all the different vendors.

Well, this place was a little different!

First, it was in a GINORMOUS warehouse. I was in awe when we pulled into the parking lot. I really didn't know what to expect since I had not done any recon for the experience. Doctor Bob likes to check places out before we go but I like to be surprised.

It hit me that this was going to be different from past trips to the farmers market as there were shopping cart return corrals in the parking lot. What market needs shopping carts? Obviously this one!

Next I noticed a big sign as we were entering the market "No cameras/picture taking allowed!" What?! Boo! How was I supposed to sufficiently describe our experience? (I encourage you to click here to check out this place as even the pictures on their website don't allow you to cut and paste.)

Then our carts were checked as soon as you walked in. All bags needed to be placed under the cart. The woman didn't let you pass until you did so.

But all of the descriptions we heard about this place were totally spot on! It was definitely overwhelming at first. There was so much to look at, so much to take in!

Produce was the first thing we saw as we walked into the market. And there were plenty of people in the produce section. We decided we would skip it for now and come back towards the end of our trip.

The bakery was next which had all sorts of delicious types of breads, desserts, and rolls. All shapes and sizes. We decided to get a package of mini French baguette's that we would transform into garlic bread for an upcoming dinner, a half loaf of oatmeal oat bran bread, whole wheat hot dog buns that were used for turkey meatball sandwiches, and a package of 2 soft pretzels as a treat. We have since tried all of the above and they were beyond delish!

After we pried ourselves away from the bakery we then checked out all the fresh meat and boy was there a lot to choose from! We ended up getting 2.5 pounds of chicken drummettes and a certified angus beef chuck roast. Don't worry, Dr. Bob will be updating you with how he prepared these into tasty meals.

Besides the fresh meat, I would have to say that Dr. Bob's favorite part of the market had to be the aisles of different sauces. He loves to check out new marinades or olive oils. We walked out with a mere 4 bottles:
And after a quick stop in the beer/wine section for some Guiness (again Dr. Bob will fill you in on how he used that special ingredient) we were ready to brave the produce section. Besides getting some new potatoes and an onion we basically stuck with the fresh fruit. I <3 fruit. I love summer time because you are surrounded by fresh fruit. I love to buy in bulk and then prep for the freezer (I have another post planned specifically for that). My new discovery/fruit friend is the kiwi so we picked up some of those. I can never resist Granny Smith apples, so they jumped in the cart as well as a package of raspberries and a package of blackberries for my morning shakes. And then I saw probably the most wonderful thing I saw ALL.DAY.LONG: a gigantic container of fresh strawberries! I was in heaven! After doing quick math to make sure we were getting the best deal, the strawberries were safely secured in the shopping cart. Our final item from the produce section was a pineapple. This summer I have been trying "new to me" fruit. It's not the first time I have tried the fruit but it is usually the first time I have prepared it. So far this summer has included: kiwi, mango, nectarine, and now pineapple. I can't wait to cut into it!

So now that we had officially finished perusing the store - it was time to check out. I was a little nervous about the final total but it actually wasn't terrible. We got all of the following:
for a grand total of $85.94. Not too bad if you consider all that we got and what it would cost at a normal grocery store.

We won't be doing this big of a shopping trip all the time but it was a great first experience!

Do you have a huge market like this near you?

Saturday, July 16, 2011

Saturday in the kitchen

The Mrs. and I found our way to Your Dekalb Farmers Market today.

WHOA! More detail coming later - she'll post up some detailed info about what we got later. But, today's purchases got me in the mood to cook for the freezer. The Mrs. is out for the day, so I'll be getting a bunch of stuff going.

The plan for today:
Pot Roast (slow cooker #1)
Breakfast quinoa with fruit (slow cooker #2)
Turkey meatballs (for meatball subs and spaghetti and meatballs)

Here's the raw ingredients for the upcoming kitchen fiasco.
Detailed posts with recipes will be forthcoming.


The plan is to make pot roast for my meals for the week. Meatballs will be for meatball subs tonight, spaghetti and meatballs tomorrow, and individual portioned meals to be frozen for storage for lunches later. Quinoa will be a quick breakfast break for the next few days.

Friday, July 15, 2011

Chocolate Chip Cookies


Hellooooooooooooo,

The Doctor and I were in the mood to do some baking last night...really I just needed some chocolate in the house...let's be honest here!

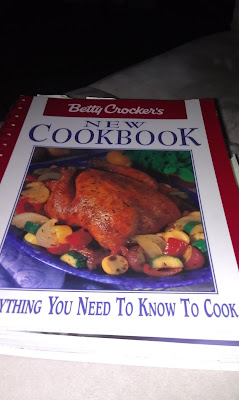
A while back we found this AH-mazing chocolate chip recipe in our "Betty Crocker's New Cookbook - Everything you need to know to cook" and we use it all the time.


Prep time: 10 minutes
Bake time: 40 minutes
Makes about 4 dozen cookies

*We made 2 batches this time. Yup that's right, we had 8 dozen cookies in our house! Dr. Bob decided to bring some in to the office as a way to meet people since he is the new guy in town so now we only have about 5 and 1/2 dozen left. They are all packed away nice so I won't be "housing" them all today. We'll get into that later.

Alright, let's get on with it.

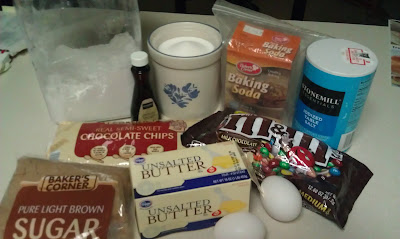
Ingredients:
3/4 cup granulated sugar
3/4 cup packed brown sugar
1 cup stick margarine or butter
1 large egg
2 1/4 cups all-purpose flour
1 teaspoon baking soda
1/2 teaspoon salt
1 cup coarsely chopped nuts (we always omit these)
1 package (12 ounces) semisweet chocolate chips (2 cups)

Ignore the vanilla extract, we thought it was in the recipe so it was included in the photo but it's not.
Heat oven to 375 degrees.

Mix sugars, margarine and egg in large bowl.

Note - you can have the butter soften naturally by leaving it out on the counter for a while before you make the cookies or you can use the microwave. If you use the microwave, make sure to set it to 50% power for about 25 seconds. You may then have to turn the sticks of butter over and do 10 more seconds. I accidentally did it on full power for the 25 seconds and it turned out okay but 50% is preferred.


We use a hand held mixer as that is all we currently have and it works just fine.

Hint for immediate family - this year's Christmas present = gift cards to Bed, Bath and Beyond so we can purchase a KitchenAid.

Stir in flour, baking soda and salt (dough will be stiff).

Stir in nuts and chocolate chips.

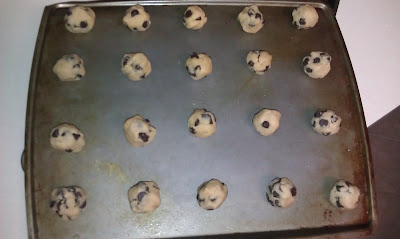
Drop dough by rounded tablespoonfuls about 2 inches apart onto ungreased cookie sheets.

Bake 8 - 10 minutes or until light brown (centers will be soft). Cool slightly (usually about a minute or 2) on pan after being removed from oven. Remove from cookie sheet. Cool on wire rack.
Super simple!!

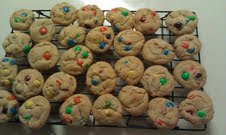
Now I told you we did a double batch and you probably already guessed the little switch-a-roo from the ingredient picture...but the 2nd batch is where we subbed the chocolate chips for M&M's.

YUM! All other parts of the recipe were duplicated.

Here is the final product....YAY! My favorite!


Now we obviously aren't going to eat all of these cookies in one sitting, although I wish we could! So what we have done is put them in quart size ziplocks in teams of a dozen and stored them in the freezer. Feel free to take out 1 or 2 for a snack, which I do all the time, or wait until you have guests over and you have a ready made snack/dessert. They will just need to sit out for a bit in order to defrost and not kill your teeth when biting in to these little bits of heaven.
Nutritional Facts - 1 cookie:
Calories 135 (Calories from Fat 70); Fat 8g (Saturated 2g); Cholesterol 5mg; Sodium 100mg; Carbohydrate 16g (Dietary Fiber 1g); Protein 1g.

If you want to make them a little lighter for you, Betty has the answer:
For 4 grams of fat and 90 calories per serving, decrease margarine to 3/4 cup, add 1 teaspoon vanilla with the egg and omit the nuts. Substitute 1 cup of miniature chocolate chips for the 12 oz package of chocolate chips.

Well I hope you all give this recipe a try...we have had rave reviews. It's not even 11am and Dr. Bob says the cookies are going like "hot cakes" at the office!

Happy Baking!

Reader Question: What's your favorite type of cookie?

Thursday, July 14, 2011

Dr. Bob's basic seasoning

This was born out of sheer laziness.

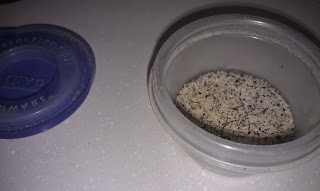
Often, when I'm trying to make something basic and quick (think: Egg Beaters for breakfast, simple broiled steak), I end up using four basic spices - salt, pepper, garlic powder and onion powder. Rather than having to open up a few different spice containers, I worked out a rough proportion, and I use this as a base seasoning for nearly everything. By no means is this the only thing I use, but it is a great quick starter, and many of the recipes I post here will involve this. I recommend making a batch, storing it in a sealed container and using regularly.

1/2 tbsp salt
1 tbsp pepper
1 tbsp garlic powder
1 tbsp onion powder

This will fit nicely into a 4 oz Glad container, and last a while. If you want to make it larger, just keep the 1:2:2:2 mix ratios.


Tuesday, July 12, 2011

The Mrs' Morning Shake

Good Morning!

I thought I would share how I start my mornings off. It is delicious and easy!

Ingredients:
1/2 cup fruit (fresh or frozen - depending on the season)
1/2 cup plain nonfat yogurt
1 scoop of whey protein (chocolate or vanilla)
1 heaping handful of spinach leaves


Cut up or pour the fruit into your blending cup. Right now I have been using a mixture of fresh blueberries, strawberries, and raspberries...yum! Plenty of antioxidants here my friends!

Note - if you are using frozen fruit, make sure to take it out ahead of time to allow it to defrost. I have an hour wait time of when I take my morning medicine and when I can eat - that is usually plenty of time to let the fruit defrost. Or you can put it in a container in the fridge overnight and you should be good to go by shake time.

Next, pile in the yogurt and whey protein.

When buying Whey - I usually find it in the grocery store near the protein bars and Ensure. Find one that has 20-25g of protein per scoop. I started off with Vanilla because I had never tried whey protein before and it tasted really good. I bought chocolate once when they were all out of vanilla and man was it fantastic! I think it is going to be a LONG time before I switch back to vanilla. But the choice is yours!


Obviously I ran out of room before getting my spinach in, so it will have to wait until I make some room in the blender.

I use a "magic bullet" knock off that I found at Big Lots for $20. It works amazingly well and it definitely saved my wallet a huge chunk of change!
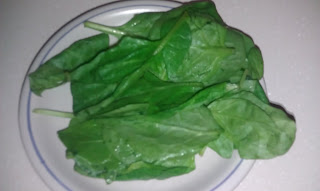
Blend that around until you have room for:

Now, you are going to have to trust me on this one. I was super hesitant to put spinach in my shake. I was told that you can't taste it at all and it is a great way to get a helping of veggies in your daily diet without even knowing it. I was a doubting Thomas, but I gave it a shot ready to toss it or hand it to the Doctor if I didn't like it. They were right...go figure! You absolutely cannot taste it and my helpings of spinach have gotten larger over time...still no taste! I am super excited because if you know me, you know I am not a veggie fan. Win one for nutrition here!

Just make sure to cut this up before putting it to the shake to make the blending process a little easier.

I forgot to take a pic of the cut up spinach or when I added it to the shake because I was so excited (and hungry) to get this thing made!


And TA-DA...the finished product.

I am reliving the shake process as I am typing and very tempted to go make another one for a mid-morning snack ;-)

This shake is super tasty and good for you. There are lots of ways you can add things to it. I tried putting some granola in after everything was blended but I wasn't a fan of the texture. I like to keep things plain and simple. Some people add milk or juice to their shakes. I have found this recipe to work for me but it is fun to experiment with other ways!

Happy Blending!


Sunday, July 10, 2011

Buffalo chicken almost-calzones

This morning, I found a post from Merissa at Little House on the Prairie Living on how to make ranch chicken calzones. We tweaked it some to add a little heat to it (and use cheese we already had), and also found that we aren't used to working with dough in a high-humidity environment, so rather than pretty looking calzones, we finished with more of a "Hot Pocket" type meal.

Ingredients:
3 cups of shredded chicken (we used the meat off a store-bought rotisserie chicken)
1/2 cup fat-free ranch dressing
1 cup shredded mild cheddar cheese
1/3 cup Franks hot wing sauce
1 pack of refrigerated pizza dough


Note: we picked up two packs of dough (yes, we were being lazy, but we also haven't done homemade pizza dough yet) but only used one. The original recipe called for garlic powder, but we just relied on the spice of the wing sauce.


Preheat the oven to 450.

After shredding the chicken


we added the wing sauce, cheese and ranch dressing, and mixed it all up.


Here's where it got tricky. One, we're not used to working with pre-made pizza dough. Two, we recently moved to a much more humid locale. Attempts to roll the dough nice and thin and cut perfect rounds with the biscuit cutter were quickly abandoned.

Plan B - tear off a chunk of dough, roll it as even as possible, and just go for it. Once we rolled the dough, a handful of the chicken mixture was added


and we folded the dough over and pinched it closed like an oversized pierogie.


A quick brush with some melted butter and into the oven they went for 15 minutes.


We got six really good sized pockets out of the recipe, and probably could have made them smaller if we wanted to fight with the dough more. They apparently freeze well, and can be microwaved or re-heated in the oven easily. We plan on freezing them and having them handy for a quick meal.

Welcome to our kitchen

Dr. and Mrs. Bob. While we make our livings with epidemiology and social services, respectively, it seems like we live our lives in the kitchen. Following cooking and frugal living blogs, searching for recipes online, digging through cookbooks and old-fashioned trial-and-error have led to some amazing meals (and some we'd rather forget).

We love cooking for our friends and families, showing people how to make simple but delicious meals and how to take old favorites and make them a little healthier. This has led to constant requests for our recipes. Rather than posting them over and over to Facebook or sending a ton of emails, we decided to start this blog to walk you through some of the things we love to cook, and some of our new adventures.